10 Tips for Crushing Your Freshman Year of College 

Wellness

This summer, my husband and his family celebrated the high school graduation of my two sister-in-laws. With both of them preparing to head off to college in the fall to start their freshman year, I find myself reflecting a lot on my own experiences as a high school graduate getting ready for life’s next important phase.

I remember being excited to start the next chapter of my life but also very, very nervous. I found myself wondering if college would be exactly how it was depicted in movies and books, and whether or not I would be able to keep up with my peers in the classroom. In order to prepare myself, I sought out advice from older friends, parents, teachers, anyone who had ever been to college. After all, who would know better than those who had already been through the same experience?

Eight years later, I’m a proud college graduate with three separate degrees and all kind of college experiences under my belt, including transferring from a private school to a public university and staying on the college journey a bit longer to pursue a Master’s. As cheesy as it may sound, I learned a lot during my time a school, both in and outside of the classroom. As I think back to try and give my sister-in-laws the best advice I have to offer, these are the tips that keep coming to mind:

  1. Show up. I know this sounds simple but it’s so important! Go to class, even when you don’t want to. As tempting as it is to blow off your 8 AM lecture, most schools have a strict attendance policy and simply choosing to show up can actually help your final grade. This lesson served me well during my college days and has continued to help me well into the workforce. Show up and be present in everything you do whether it’s class, sports practice or a job interview. Putting your best foot forward will help you make the most of your time at school and will serve you the rest of your life.
  1. Smile and be friendly! This advice is key no matter what stage of life you’re at! Kindness is infectious and while people may not always remember the things you said and did, they will always remember the way you made them feel. Get off on the right foot with your roommate by offering to eat meals together in the dining hall, introduce yourself to your fellow dorm-mates and be a positive presence in the classroom.
  1. Dress to impress. While you may be looking forward to making sweatpants and a t-shirt your everyday uniform, how you present yourself is ultimately part of your personal brand. Dressing a little nicer will help you stand out to professors who will double as job references and members of your professional network as you get closer to graduation.
  1. Don’t overpack. This is easier said than done but only pack the essentials. Chances are, your freshman dorm room won’t be overly spacious and you might even be sharing the room as a triple if your college over-admitted applicants. Sticking to the basics will help you keep your space clutter-free and will save you and your parents a major headache when it’s time to move out at the end of the spring semester!
  1. If you haven’t already, set up your LinkedIn profile. LinkedIn is a social media platform designed to help professionals network, learn more about employers and find jobs. Setting up your profile early will make it easier to add experiences, relevant coursework and honors as they come along. Plus, the sooner you start making connections and growing your network, the better!
  1. Take advantage of all your resources. Whether it’s spending extra time in the new state-of-the-art science lab, checking books out from the university library or attending your professors’ office hours, never take for granted all of the resources that are at your fingertips. They’re there to help you succeed!
  1. Step outside your comfort zone. The best part of college is the wide collection of new opportunities and experiences that are being thrown your way. Use this time in your life to say, “yes” and try absolutely everything. Join a club that high-school-you wouldn’t have thought of joining, visit your school’s art gallery, audition for the musical or try intramural sports; the possibilities are endless!
  1. Be your true self.  Never forget: You’re not in high school anymore! Whoever your peers thought you were in high school no longer applies. You can be whoever you want to be. In fact, you can be the best thing possible: your true self.
  1. Take care of your health. The rumors are true: college can be stressful. Make sure you’re taking time to take care of yourself and do the things you enjoy. Practice stress-relieving methods like yoga, writing, listening to music or using anxiety-management apps to help you keep your stress levels at a minimum. If you ever find yourself feeling incapable of handling your stress on your own, seek help from your on-campus health center.
  1. Have fun! In between the lectures and late-night study sessions in the campus library, make sure you’re taking time to have fun and enjoy these special years. Make friends, go to a party (or two, or three), explore your college town and remind yourself how lucky you are to have the opportunity to continue your education. Laugh often, make memories and cherish every moment.

Download a printable version

6 Ways to Spark Your Creativity

Inspiration

If you’ve ever had to be creative for work or been asked to be creative on-demand, thrn you know how frustrating it can  be when – despite your best efforts – inspiration just doesn’t strike. As a communications professional and practicing artist, I know this struggle well. But through my own personal struggles, I’ve discovered a few sure-fire ways to help get through even the toughest creative block and get those mental juices flowing yet again.

Whether you’re a creative professional trying to get a project done or perhaps someone who identifies as not being very creative but wants to be, use these six tips for inspiration.

Learn more about yourself. Ask yourself – do you feel more motivated in the morning or right before bed? Do your best ideas come to you when you have time to relax or when you’re busy thinking about homework or everything you have to do at work tomorrow? Sometimes the key to creativity is mindfulness. Think back on your most creative instances and look for some common denominators. Keeping a journal is a great way to identify these trends!

img_2094

Listen to music. Listening to music can be a relaxing way to get out of your own head. Try a new playlist on Spotify and see where the music takes you.

Tap into other creative outlets. If you’re a painter, try gardening. If you’re a singer, try baking. Trying new creative things or using less-utilized creative talents can help get your creative juices flowing again. For example, I love making art but I also love to sing and play piano. Whenever I am feeling less motivated in one of those areas, I lean on the others to keep myself inspired.

Admire the work of others. Do your research and look at what other leaders in your artistic field are doing. What’s amazing about creative ventures is that no two people approach things the same way. Everyone has gone through different training, taken a unique path and possesses their own sense of style. I love getting on Pinterest to check out what other artists are working on and flipping through art book from my local library. I also love visiting art galleries and museums. One of my favorite inspirational places is the Metropolitan Museum of Art in New York City.

Spend time outside. Being outside puts your mind at ease and is proven to reduce stress which, for many, is key to being creative. I’m a big believer in hygge, which is the Danish concept of living life simply to find joy. To live a hygge lifestyle is important to always make time to be outside.

Give yourself a break! Modern life is all about being busy, all the time. But it’s OK to take a break once in a while. In fact, it’s more than OK; it’s necessary! Spend some time away from the project or hobby that is causing your creative block. You might be surprised what comes to you after taking a break away from it to have some fun (or take a nap).

Follow these six simple tips and you’ll cure your creative block in no time!

4 Creative Gift Ideas for Mother’s Day

DIY

There’s no better time to show appreciation for the women in your life than on Mother’s Day. I’m so grateful to not only have a mother who always supported my dreams (unfortunately, not all parents are cool with their kids being Studio Art majors), but also an amazing grandmother who doubles as a best friend and a seriously kick-ass step mom who is truly, an inspiration.

This year I was also lucky enough to gain an amazing mother-in-law, who is as kind as she is self-less.

45791244_10156390729139064_7671416665648660480_o.jpg

As you’re deciding upon what to gift mom this year, try getting creative and thinking outside the box. Check out these four ideas to get your creative juices flowing:

Nothing says “I love you” like baked goods

There’s a reason we use the expression “made with love” whenever we talk about homemade goodies. Bake up your mom’s favorite treat and package it in a cute box with a festive bow. Make the gift extra special by using a family recipe.

Or check out some of my favorite goodies using the recipe links below:

24959004_10155554350054064_7640106636429047977_o

Give the gift of mindfulness

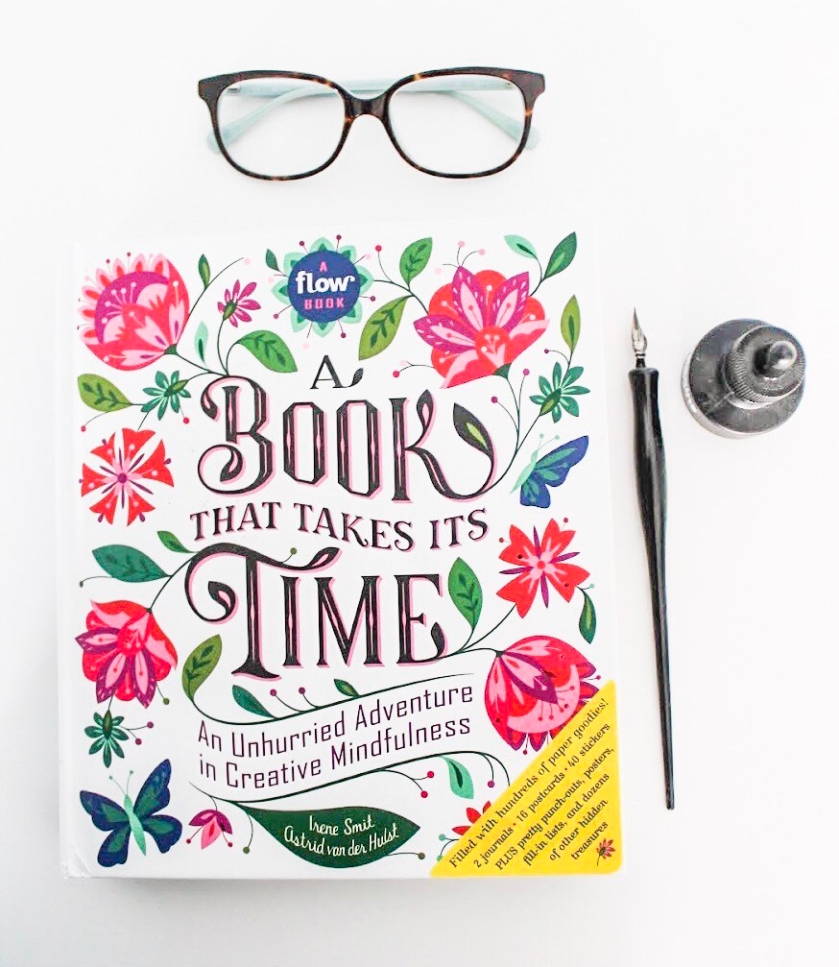
Moms have a lot going on! Inspire mom and help her find some peace from time to time by gifting her a journal to keep her thoughts organized and de-stress. Journals come in so many fun shapes in sizes. I especially love this book that teaches readers to be more creative by being more mindful and relaxed. Read more about this title here and shop it here.

img_4749

Gift her flowers…then show her how to save them!

Flowers are always a safe bet. This Mother’s Day, take the extra step and show mom how to preserve the bouquet even after the holiday has passed. All you need is some string, a dark place (closet) and some hairspray. For more information on preserving flowers, click here.

img_4659

Learn something new together! 

Creative workshops have become super popular over the last few years, with artists and DIYers offering up their expertise to teach community members new skills. While you’ve probably come across a painting workshop or two, think outside the box and try new skills like calligraphy, weaving or embroidery. Look for a workshop near you and buy tickets for you and your mom to go together. Mom will enjoy spending time with you and you’ll both be learning something new!

img_5104

Follow me on Instagram @theperpetualcreator to learn more about my upcoming workshops!

Screen Shot 2019-05-05 at 10.35.18 AM.png

Wishing you and your mom the best possible Mother’s Day filled with love.

Easter Brunch Carrot Cake Muffins

Food

Call me out for being a Millenial, but I LOVE brunch. For one thing, I love how it’s strictly a weekend thing (not being able to brunch every day makes it more special) and for another, I love how creative you can be in your brunch menu.

Is it breakfast? Lunch? Dessert? It’s whatever the heck you want it to be! And that’s what makes it fabulous.

Usually my family does Easter dinner but this year we’re changing it up to accommodate everyone’s busy schedules and dong brunch instead. As you can probably imagine, I’m really excited about this! I’m looking forward to mimosas, biscotti and breakfast casseroles all around.

Because I’m not one to show up empty-handed, I decided to whip up some carrot cake muffins. This sounds like something the Easter bunny would like, right? I found this amazing recipe for healthy carrot cake muffins on The Ambitious Kitchen and was pleasantly surprised to realize I had all of the ingredients in my house already (serious adulting win).

I followed the recipe for the muffins step-by-step but decided to stray from the recommended glaze suggested in the post. Because it’s a holiday afterall, I went with a more traditional cream cheese frosting and honestly love how the hearty, healthy flavoring of the muffin pairs with the sweet cream cheese frosting.

In an attempt to make the muffins look a little fancier, I used a piping bag and round decorating tip to pipe on the frosting. I also added a sprinkle of nutmeg for the finishing touch.

INGREDIENTS

  • 1 1/2 cups whole wheat pastry flour
  • 1 teaspoon baking soda
  • 1/4 teaspoon salt
  • 1 1/2 teaspoons cinnamon
  • 1/4 teaspoon nutmeg
  • 1 cup finely shredded carrots (about 2-3 carrots)
  • 1/2 cup pure maple syrup
  • 1 tablespoon olive oil
  • 1/3 cup natural unsweetened applesauce
  • 1 egg, slightly beaten
  • 2 teaspoons vanilla extract
  • 1/2 cup Almond milk
  • 1/2 cup unsweetened shredded coconut flakes (optional)

INSTRUCTIONS

  1. Preheat oven to 350 degrees F. Line 12-cup muffin pan with liners and spray the inside with nonstick cooking spray to prevent batter from sticking to the liners.
  2. Add flour, baking soda, cinnamon, nutmeg and salt to a medium bowl; stir to combine and then set aside.
  3. In a separate large bowl, add carrots, maple syrup, olive oil, applesauce, egg and vanilla. Whisk to combine wet ingredients then slowly stir in almond milk and flour mixture until just combined. Fold in coconut flakes if you’d like.
  4. Divide batter evenly between muffins cups or liners.
  5. Bake for 18-20 minutes or until toothpick inserted into the middle comes out clean.
  6. Allow to cool for 10 minutes in pan then transfer muffins to a wire rack to finish cooling.

I paired these muffins with my go-to recipe for cream cheese frosting. It’s the perfect amount of sweetness and requires minimal ingredients. Whip it up by combining these ingredients with an electric mixer:

CREAM CHEESE FROSTING

  • 8 oz cream cheese
  • 2 tsp vanilla extract
  • 4 cups confectionary sugar
  • 2-3 teaspoons milk


While I’m posting this recipe for Easter, these muffins would be great any time of the year! I know I’ll definitely be revisiting this recipe in the fall when I’m craving all-things-spice.

To shop the products featured in this post, click on the corresponding links below!

Carrot garland 

Cupcake stand

Cake decorating kit 

The links featured in this post are affiliate links. 

Introduction to Hand Embroidery Workshop: What to Expect

Workshops

This past weekend I held my first Sip & Stitch embroidery workshop, teaching beginner hand embroidery to a handful of women looking to get into modern stitching as a way to de-stress and make art. The session was held in my home and was so successful (much to my admitted relief and joy) that I’ve already scheduled another session and have a lot of fun ideas in the works!

IMG_3143Because fiber art (especially embroidery) can be intimidating to a lot of people, I wanted to write a quick post to break down what to expect from a beginner session. I promise it’s not as difficult as it looks! And I know you will have a lot of fun doing it. Seriously – embroidery is addictive.

Here’s what you can expect from attending a Sip & Stitch session:

Basics

If you’re attending a introductory workshop I’m assuming you’ve never embroidered anything before – and that’s really exciting! You should be proud of yourself for trying something new and I’m really excited thinking about how much you’ll love embroidery once you try it. Because this is a beginner session we will cover things like basic embroidery supplies, how to use an embroidery hoop and trips and tricks for threading your needle.

Even if you’re not a beginner, I encourage you to attend the workshop to have fun with others who are interested in learning more about your beloved artform. Attending a workshop might also inspire you and give you new ideas as to what’s possible!

Stitches

Ahhhh stitches – the basics of hand embroidery! During these sessions we will cover 5-7 basic embroidery stitches that will help you complete your project and give you the confidence to keep stitching and explore new patterns.

To learn these stitches, we will spend the first hour together learning and practicing. Everyone will leave with their own stitch sampler to refer back to once they take their project home.

Coffee

No one comes to my home without being offered coffee! It’s my favorite beverage and perfect for a hyggelig session. Don’t know what hygge is? No worries, we’ll cover that too.

Fun

Whether you attend a session with friends or family, or are coming to enjoy the company of future-friends, I promise that your session will be a lot of fun. As you may imagine, learning embroidery tends to lend itself to laughter all around the table — it’s part of what makes beginner sessions so fun!

Unique artwork

Although I will be supplying you with a pattern, how you choose to complete your piece is completely up to you! I love seeing how everyone approaches patterns differently through the use of stitching and color. You will spend the second part of the session working on your pattern, picking out thread colors and sharing ideas with one another.


Celebrating International Waffle Day

Art

Happy International Waffle Day! I’ve always been a big fan of this Belgian breakfast, but becoming a dedicated “Parks & Rec” fan over the past few years has really sealed the deal on waffles being my favorite breakfast food.

lesliewaffles

Today I’m celebrating this fun breakfast-themed holiday with a quick sketch I did using Faber-Castell Gelatos. I received a Gelatos gift set for Christmas this year and was excited because – to be completely honest with you – I had neither seen nor heard of these before.

I used this waffle sketch to get to know the medium and discovered that they are a lot like oil pastels with one major difference – you can water them down and use them like paint! This is fun because you can also use them as a stamping material. I’m really looking forward to playing with Gelatos more in the future!

img_4990

I also plan on celebrating National Waffle Day by having “brinner” tonight. Andy bought me a Black & Decker waffle iron for my birthday a couple of years ago and I look for just about any excuse to use it. If you don’t already own a waffle iron, I highly recommend it! It heats up super fast and the waffles always come out looking picture perfect.

To shop this waffle iron on Amazon, click here.

The links featured in this article are affiliate links.

Tips and Tricks for Drawing on Fabric

Art, DIY

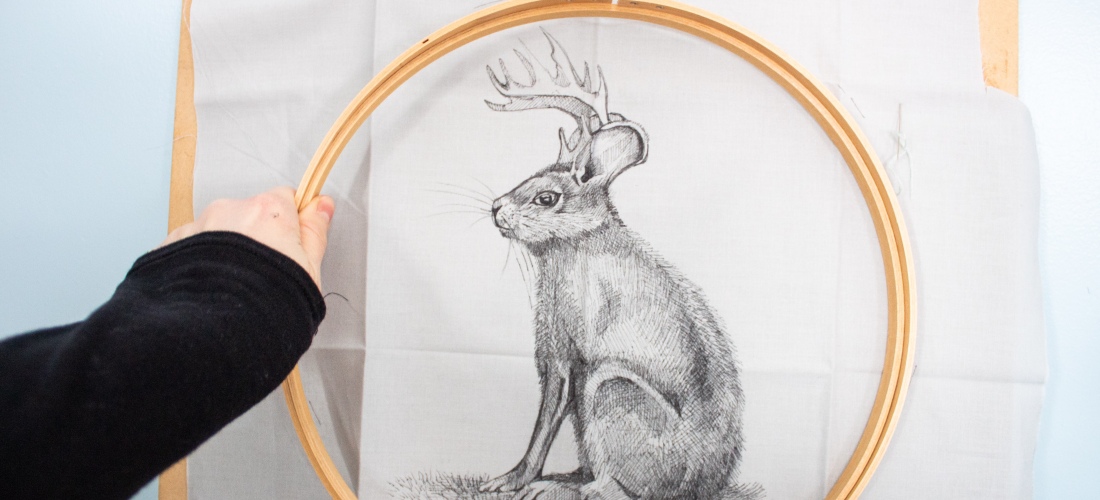
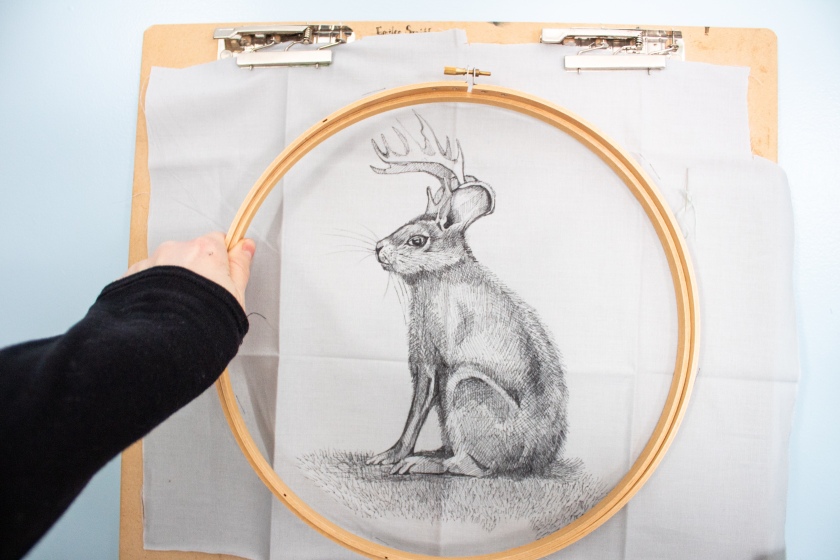
I really love to draw. But I also love fiber art. So – what’s one of my favorite things to do? Draw on fabric! To me, drawing is the foundation of all art and I love bringing it into the fiber-verse whenever I can.

Drawing on fabric has a few different use cases including:

  • Artwork: If you are like me, then maybe you want to draw a masterpiece on a piece of cotton. If you’re not like me and don’t understand why one would want to do this, think about all of the fun embroidery and sewn elements you can add to the drawing when it’s done on fabric!
  • Embroidery designs: I love drawing embroidery designs right onto the cloth. 
  • Sewing projects: Sometimes you need to draw out a pattern or indicate cut lines.

Whatever your reason for drawing on fabric, there are a few tricks to keep in mind to keep the process fun and frustration-free. Here are my top tips to get you started:

  1. Iron out those wrinkles: Or steam them out! You won’t want those pesky wrinkles getting in the way of your design and tripping up your pen. I have a travel-sized steamer that I keep in my studio that I love using for these occasions. 

  1. Pick the right drawing tool

I you’re drawing an embroidery pattern or making marks for a sewing project, then you’ll want to use a marking pen. I love this pen by Dritz because the ink is disolvable by either air or water, depending on what side you draw with. This is great for making marks that you don’t want to be permanent.

  1. Be wary of bleed

If you’re using a marker, or pen and ink, be wary of ink bleeding through to the other side. To be on the safe side, do your drawing on a drawing board or place scrap paper beneath the fabric. I’ve had this board since college and use it for soooo many projects. It’s my on-the-go studio space!

  1. Add texture

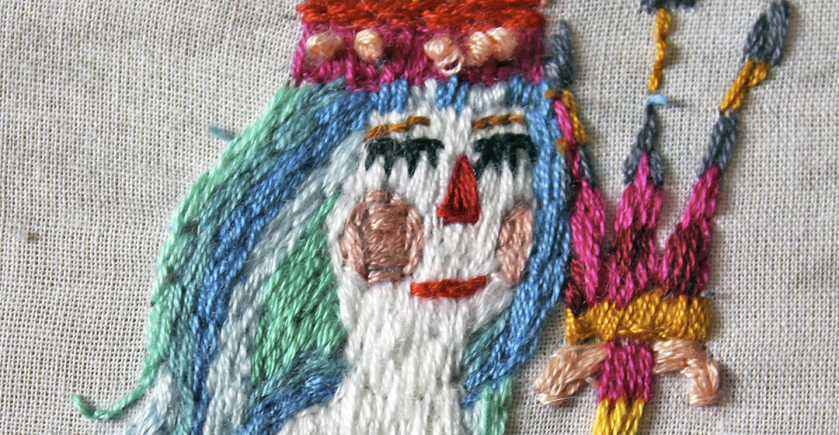
Bring your drawing to life with embroidery! I have a penchant for hand embroidery but adding stitching with a machine is also a lot of fun. Utilize French knots for even more added texture.

Mermaidembroidery1

The Perpetual Creator a participant in the Amazon Services LLC Associates Program, an affiliate advertising program designed to provide a means for sites to earn advertising fees by advertising and linking to Amazon.com

Whipped Mocha Frosting and the Cutest Dessert Stands

Food

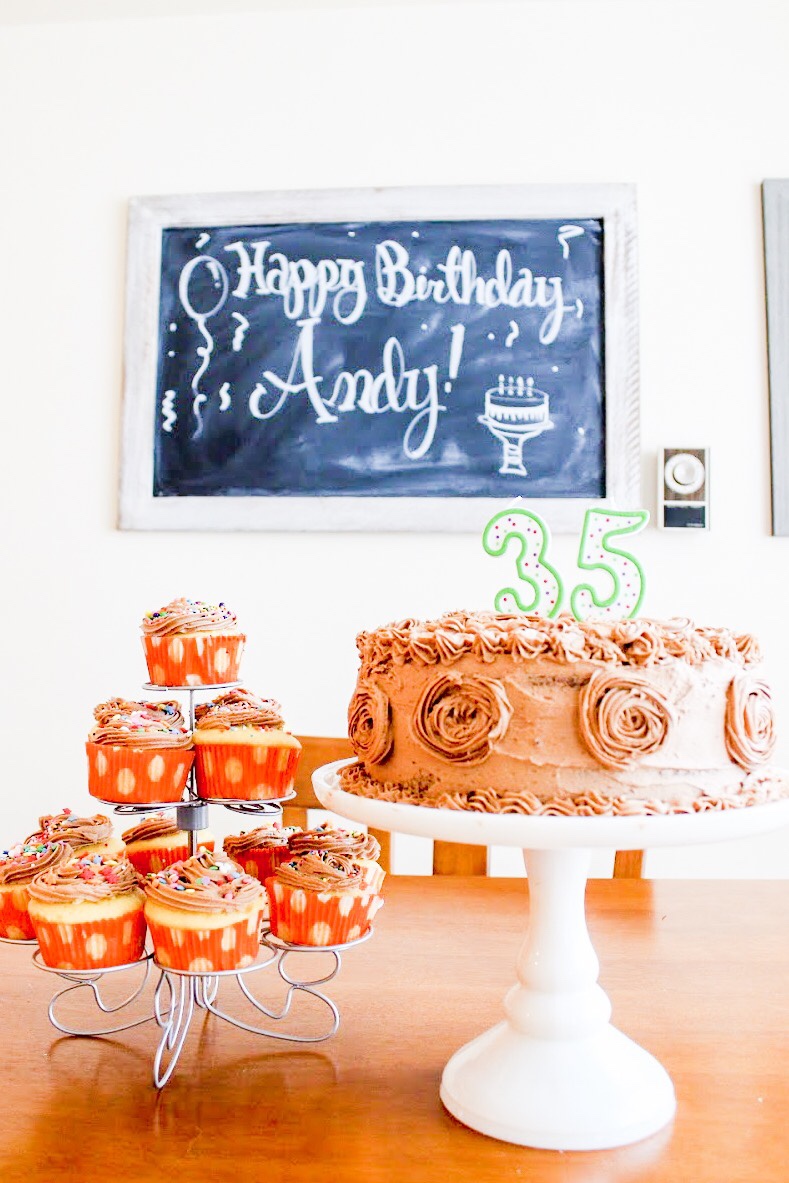
This weekend we celebrated my husband Andy’s 35th birthday! This was really exciting for us as it was the first birthday celebration we were able to host in our own home (our last house was waaaaay too tiny to host his large family all under one roof). It was really great having everyone over for what turned out to be a lovely afternoon spent indulging in entirely too much pizza, ice cream and cake covered with Andy’s favorite frosting: Whipped mocha.

Typically, I pair this frosting with marble cake and an apricot filling but it really does taste great with any kind of cake. Andy actually asked for a devil’s food cake this year and the added chocolate made the dessert extra decadent.

I was really missing the apricot filling though so I decided to also whip up a batch of yellow cupcakes and fill them with apricot preserves!

While I’m still very new to cake decorating, I tried to make both the cake and cupcakes fun by piping details with a star tip and throwing some colorful sprinkles on the cupcakes.

Adding to the whimsy, I displayed the treats on stands. Doing so really helps elevate your display and makes grabbing for a treat extra fun for your guests!

The Pioneer Woman cake stand featured in these photos is so adorable and I honestly leave it out on my counter all the time. Its farmhouse charm adds to my kitchen decor and it is perfect for storing all kinds of goodies including cookies, bars, brownies and doughnuts. I can honestly say it’s one of my favorite kitchen items!

img_4929.jpg

I’m also loving this cupcake stand, which holds up to 13 treats. One thing I especially love about it is that it unscrews into three pieces, making it incredibly easy to store in your cabinets. This also makes it portable for displays on the go! Bring it to parties or family gatherings for a more sophisticated display.

To check out my recipe for whipped mocha frosting, click here. I promise you’ll use it again and again – it’s so tasty!
And to shop the items featured in this post, click on the links below:

Large Chalkboard

Pioneer Woman Cake Stand 

Wilton Dessert Stand

The Perpetual Creator a participant in the Amazon Services LLC Associates Program, an affiliate advertising program designed to provide a means for sites to earn advertising fees by advertising and linking to Amazon.com

A Creative Practice in Mindfulness

Wellness

I’m willing to bet you’ve heard the word “mindful” before. It’s a bit of a buzz word. A hot topic. But what exactly does it mean to be mindful? This is what Dictionary.com has to say:

a mental state achieved by focusing one's awareness on the present moment, while calmly acknowledging and accepting one's feelings, thoughts, and bodily sensations, used as a therapeutic technique..png

In layman’s terms, mindfulness means focusing on being mentally and physically present, and using that time to check in with yourself. Practicing mindfulness has a lot of great benefits including:

  • An increase in gratitude
  • Decreased stress
  • A more positive outlook

It can also do wonders for your physical health. For instance, slowing down and practicing mindful eating has been known to aid weight loss. And meditating before bed is shown to help you have a more restful sleep.

Bottom line? In a society that praises multitasking, it’s important to remember that our self worth is not based on how busy we are. There  is a lot to be said of slowing down and taking life one thing at a time. This actually helps us enjoy our experiences more and aids us in getting to really know ourselves.

So how do you become more mindful?

There are many different ways you can practice mindfulness including yoga, journaling, meditation or even just using your daily commute to check in with yourself and ask yourself how you’re doing.

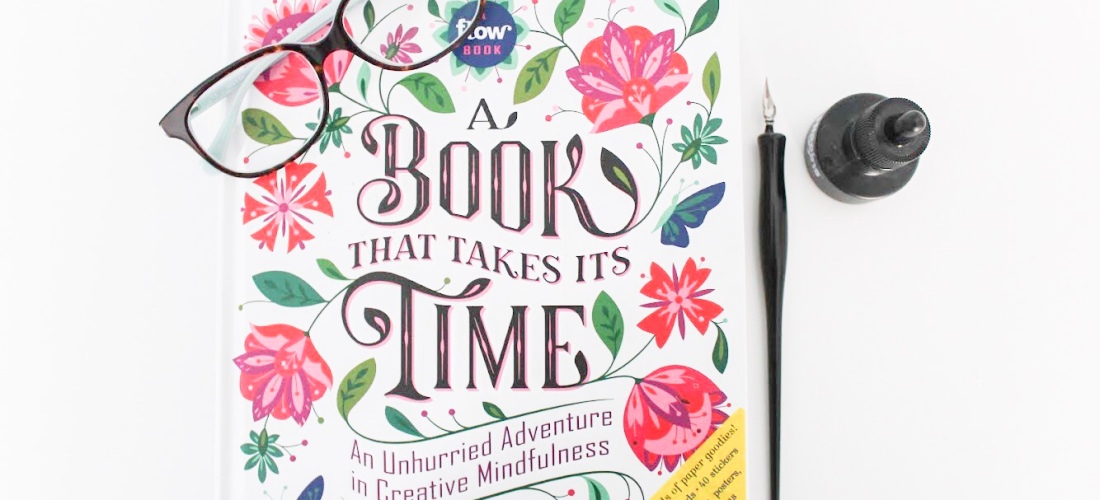
Today, I’m sharing an interactive book that is particularly helpful for creatives looking to become more mindful. I know it definitely helped me! Published by Flow Magazine, “A Book That Takes It’s Time: An Unhurried Adventure in Creative Mindfulness” is basically a Godsend for those looking for a creative way to become more in-tune with themselves.

The Amazon description will tell you that this book is essentially a “mindfulness retreat between two covers” – and I couldn’t agree more! I love how this book mixes reading with interactive activities. It’s basically an activity book for adults. (What else could you ever want in life?)

Some of the activities include:

  • Collaging
  • Journaling
  • Stickers
  • Drawing

And all of the activities share a common theme: Slow down and enjoy life. 

This book is perfect for creatives looking for inspiration, lovers of books and anyone looking to become more mindful. This book would also make for a terrific gift.

To shop this title on Amazon, click here.

How to Take Your Weavings Beyond a Basic Scarf

DIY

One of the biggest questions I get about weaving is, “What do you do with the weavings?” or “Can you make more than just scarves?”

I love approaching weaving from an artist’s mindset, meaning I like to weave works of art that convey an idea or concept. This might be weaving a specific pattern or color to convey a feeling, or adding embroidery to tell a story. So for me, I don’t feel the need to necessarily “do” anything with my weavings because they do something on their own – they’re art!

The other approach to weaving is from a crafting, DIY perspective. In answer to,”Can you make more than just scarves?,” the answer is absolutely! There are soooo many things you can weave. Some projects include table runners, dish towels, blankets, coasters and pot holders – to name a few.

These projects are all straightforward (or, I should say, rectangular) and don’t require any sewing. But what if you feel like moving beyond the basic rectangle?

In that case, the possibilities are endless! 

This is something I’m just starting to explore more myself, so I know how scary it can be to take a pair of scissors to your precious handwoven cloth.

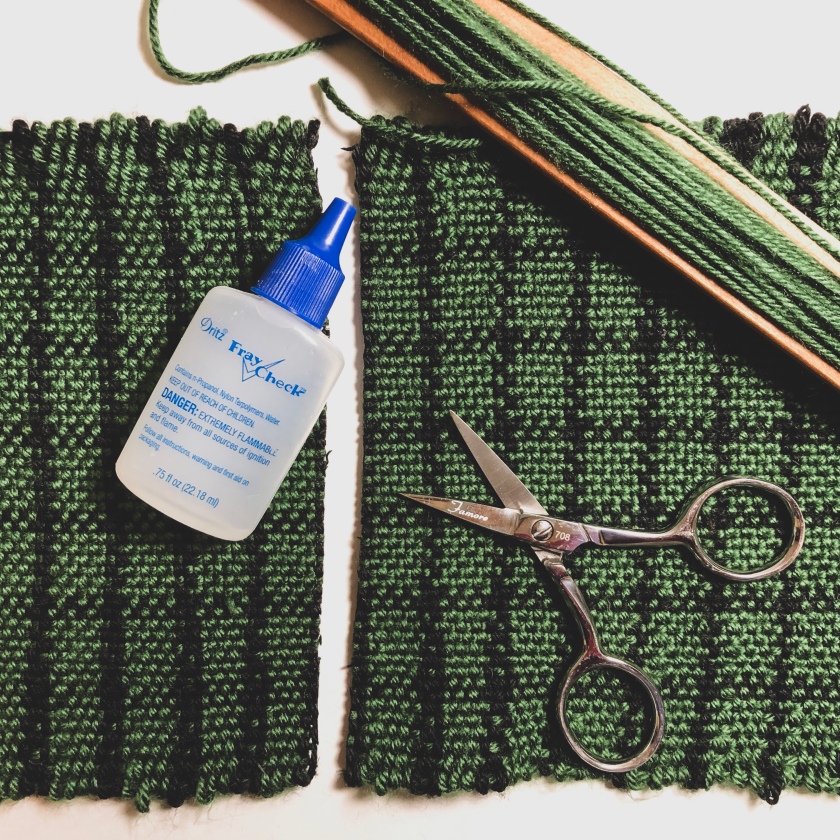
Before cutting into your weavings, there is one very, VERY, important investment you need to make: Fray Check. This is the magic that’s going to make cutting into your weaving 10,000 times less scary. Seriously. ✂️

This product is an absolute Godsend and you can buy a two-pack on Amazon for under $10. Worth. Every. Penny.

So what exactly is Fray Check you ask? Essentially, a glue that helps keep your cloth from fraying. Designed for sewers, it works just as well for weavers! Using Fray Check, you can bind your cloth together where you’re going to cut it.

Both of the projects featured in this post I put together with the help of my handy-dandy friend, Fray Check.

How to use:

  1. Decide where you will be cutting your cloth and run a line of Fray Check across. (Do this in a well-ventilated area).
  2. Allow the Fray Check to dry.
  3. Once dry, turn the cloth over and put a corresponding line of Fray Check on the other side.
  4. Once the fabric is completely dry, you can go ahead and make your cut! Use sharp scissors to give yourself a nice, clean cut.

Use this trick to start transforming your beautiful cloth into different projects. If you’re nervous about fraying edges, you can also run stitches across the edges to make them extra secure. Depending on the weight of the yarn, you can either run the cloth under the sewing machine with thread or hand sew it with yarn leftover from your project.

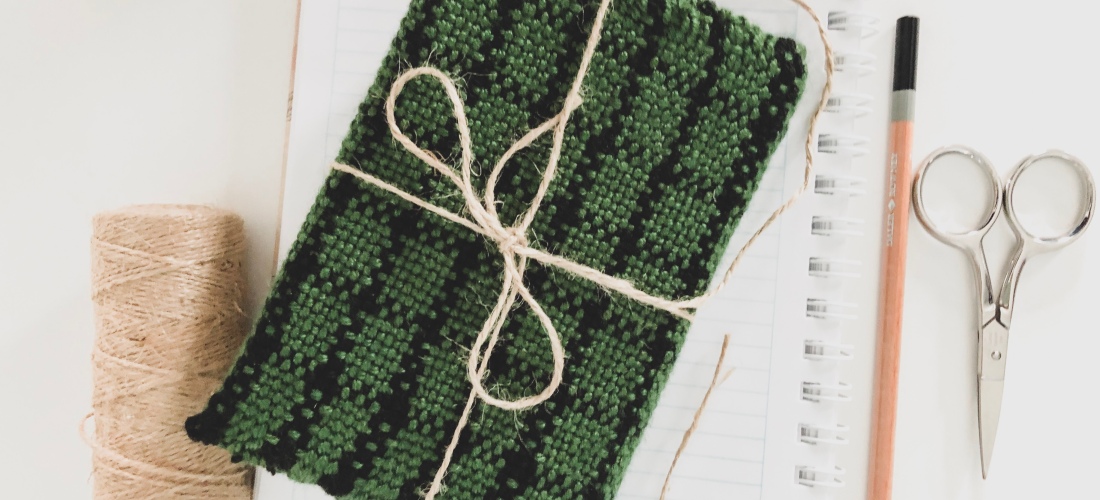
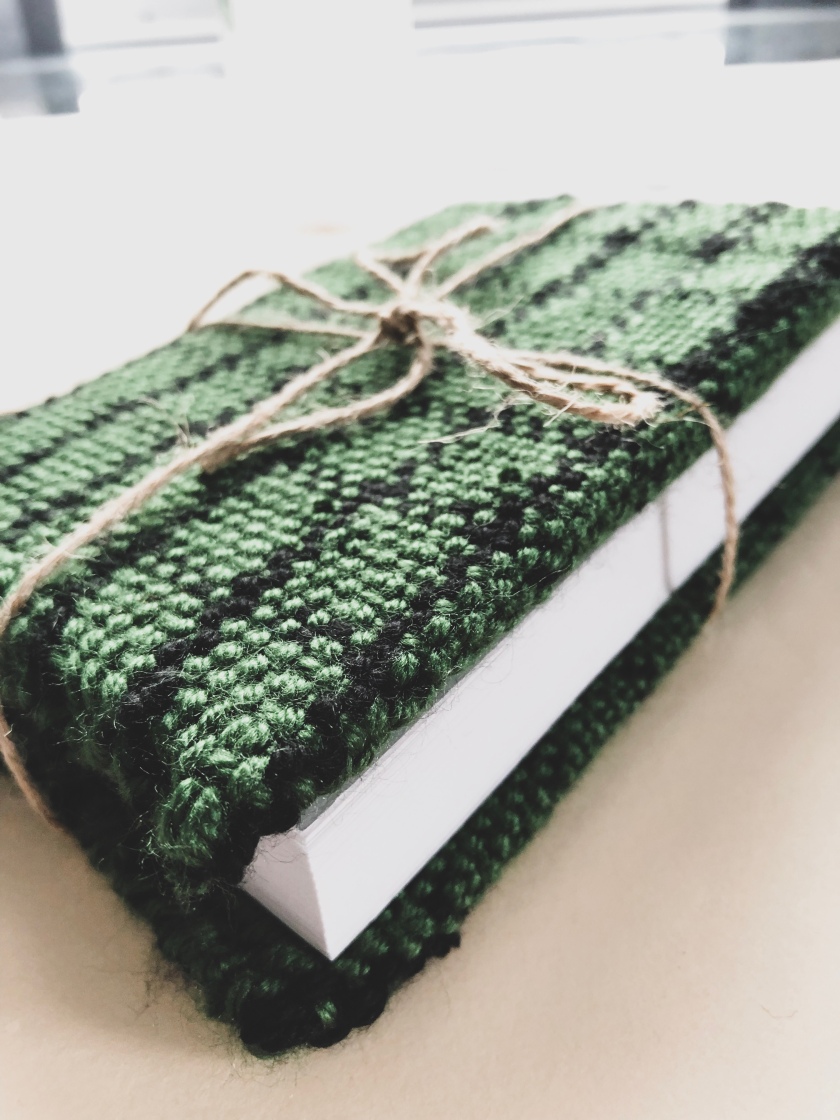
As you can see, I transformed this green, checked weaving into a small pouch (perfect for stowing pencils, erasers, and other art supplies!) and a sketchbook cover. I love that I was able to get two projects out of one small weaving. It definitely makes warping worth your while. 😸

Not sure what you want to make first? Check out some of these ideas on Pinterest.